Thursday, October 6, 2011

More Unusual Buildings!

All these structures are barns and silos!
 Car Barn - De Witt - IL
Castle Farm - Charlevoix Co MI

 
Clock Barn - Tuscola Co - MI
Elephant Barn - Clearfield Co - PA
Jesse James Hideout Barn - Harrison Co IN

Man Falling Barn - Pochahontas Co - WV
Bossie Mootel (get it?) Barn - La Crosse Co WI
Pumpkin Silo - Kane Co - IL
Beautiful Stone Barn - Steuben Co IN
Tractor Silo - Fulton Co OH
Tractor Silo - Kankakee Co - IL
Unusual Barn - Allen Co- OH

Have a great day!
RWS

Wednesday, October 5, 2011

Paper mache

MixUpGallery   
I remember in grade school we got to use papermache, those long guey strips of newspaper with the gobs of paste dripping off.
Our Art teacher had us wrap papermache over a balloon, let it dry and then cut it open. Then we got to paint the outside in whatever colors we wanted. Once that dried we glued a little Easter scene inside. Of course our parents were the delighted recipients of our handmade treasures.

mosaicmache 
In the years since grade school...(trust me it has been many) I have played with paper mache here and there. After finding these cool items, I am thinking it is time to start to play with it again.

Fishstikks 
tylersworkshop 
paperponies
 I love the old Jack-o-laterns and here is one made similar to those older versions.
OldSaintNick  
 Here are some other Halloween decorations made with papermache.
OffTheBeam
Pawprints49
This is another item by  fishstikks. I had to include this one too, as it just cracks me up.
Fishstikks   

I love all these creative items that these artists have used the papermache for. It really does make me want to tear up some strips of newspaper and mix up that gloppy glue and have a blast. (the mess I will worry about tomorrow...)

(jj)

Tuesday, October 4, 2011

Harvest Fruit, The Freshest Ever

It appears to be a consensus that we at A Collective Journal love Autumn. The colors, cooler temperatures, food, holidays, and you can even change your entire wardrobe, it's all new again.

I had a hard time selecting my theme for this week, but finally settled on the fruit harvest. I love the colors and taste of fresh fruit, and by the time I finished with these photos the only thing I wanted was my mother's famous fruit salad, with fruit juice and all.

 Here are the pictures and I don't think they need any additonal input from me. They speak for themselves perfectly.


Apples

Apricots


Blueberries


Cherries


Grapes


Oranges


Lemons


Citrus


Peaches


Pears


Cherries


Strawberries


Persimmons

Pick your favorite fruits and mix them together.  Keep all the juice, add sliced banana just before serving. (You do need some citrus for the juice and tang.) 

I hope everyone is so totally hungry for fresh picked fruit right now. LOL

Pepper

Monday, October 3, 2011

PUMPKINS! I LOVE PUMPKINS!

Most people who have followed this blog for any length of time realize that I have a "thing" for pumpkins...in fact when Autumn season comes along you will find us traveling...with mini pumpkins on our dash...WooHoo...It is now Autumn!

Pumpkin Time :)

So I went surfing, on the internet,  for a tutorial on how to create a fabric pumpkin and found just the pumpkin I wanted to make...on a wonderful blog... "The Simple Wife", click on the blog name to be taken to her tutorial...it was written in 2008 so it may take a few minutes to load...but it is worth it!

 Today, I went to work creating my fabric pumpkin:
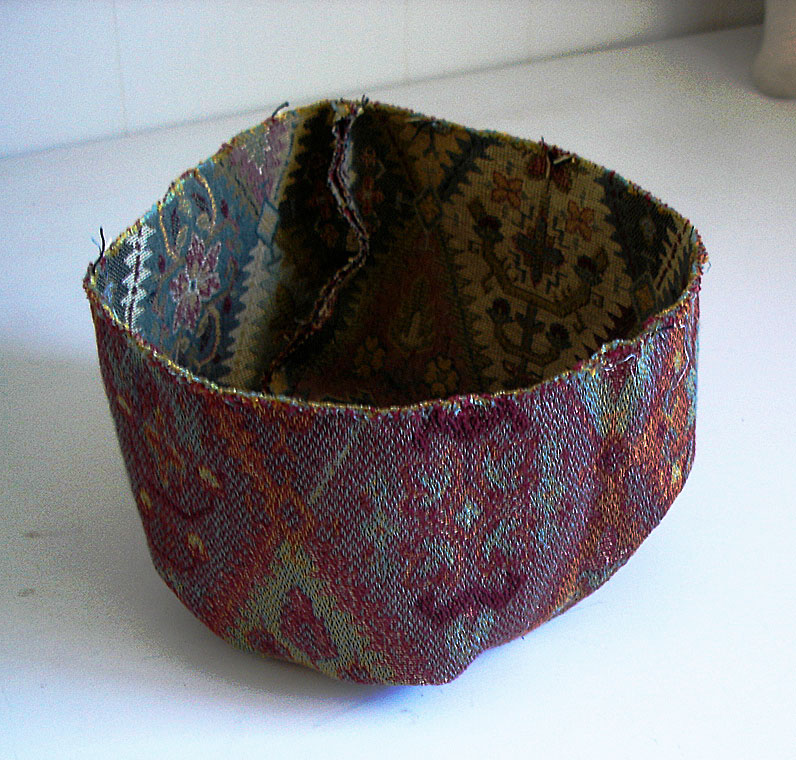
First I chose a piece of heavy upholstery fabric (my suggestions is to use a lighter weight fabric for your first pumpkin, this was harder to work with).  I looked at both sides of my piece...
And decided to use the "wrong" side since it had more orange in it...


Following the directions on The Simple Wife I put the 2 ends together and created a seam, I used my sewing machine but this could be hand sewn also.


Next, I hand sewed a large running stitch all along one edge, about 1&1/2" up from the edge.  This was my gathering thread and it needs to be a strong thread and a double thread to make sure it does not break as you gather.  When the gathering was tight I tied the thread ends together and ran a few stitches through the fabric to make sure the gathers held.


I then turned my Pumpkin  so the correct side was now out....
 At this point I hand sewed another running stitch around the top edge of the pumpkin, again about 1 to 1&1/2" from the edge.  I did not gather it yet.

Joanne, The Simple Wife,  recommends filling your pumpkin with a mix of fiberfill stuffing and either rice or beans...for me it worked best to put a layer of fiberfill on the bottom, the filler in the middle and another layer of fiberfill on top, I also shoved fiberfill into the nooks and crannies to get the pumpkin shape I wanted.

After filling my pumpkin I gathered the top with the running stitch, tied the threads and sewed the top a little tighter to secure the thread.


Now for the stem,  Joanne suggests using actual stems from a pumpkin if you can obtain them without removing them from pumpkins in a store :)  I had no pumpkin stems :(  but I do have a husband willing to go the extra mile for me...in this case it meant he went to our yard and "trimmed" some bushes to find the perfect chunk of branch for my pumpkin :)  

Thanks Honey!
I inserted the stem into the hole where the top is gathered, (mine is not secured  yet)...Joanne suggests gluing it with hot glue...but for now it seems fine just as it is :) 

I have it sitting, with 2 others I created today, on my table...Once you get the hang of making these they take about an hour each...


Thanks Joanne for putting your tutorial together, it was perfect!


VE aka VintageEmbellishment

Saturday, October 1, 2011

Let's Promote!


Happy Weekend!
I'd like to offer 20% off anything in my shop!  Sale excludes shipping costs but does include even items that are all ready marked down!  So, have fun shopping, let me know what you are interested in purchasing  and I'll set up a sale listing for you OR go ahead and pay via PayPal and I'll refund the 20% back to your account.
So, visit my shop by clicking on my banner below and have fun shopping!  Think Christmas!!!  Costume jewelry makes great gifts!
SALE ENDS Sun, Oct. 2 @ midnight!

Have a great weekend!
VS


Great sale there VS.  And because it's the first weekend in October, I want to follow suit and offer 15% off any jewelry item in my vintage shop.  Just as VS stated, the discount does not include shipping.  There are already discounted items and so you will get an additional 15%.  How can you pass that up?  15% off even on lot listings for those creative people that love to repurpose, recycle  old vintage jewelry.
So have fun.  I will refund the difference through Paypal or reduce the listing for you.  Just shoot me an email.
Sale ends Sunday night at midnight (PST for me)
Thanks for stopping by and happy shopping!


I think I will just promote a new listing.....I did a sale a couple of months ago where vintage baby items were asked for quite often...so when I saw this sweet little hand crocheted bib...well you know what I did...I bought it and listed it!  LOL!
I have been gathering vintage and antique children's items for several years now...so guess this might be the time to actually try to sell them...
VintageEmbellishment


I am going to post something from Peppercorns shop....since I purchased a set of these in another color and I LOVE THEM!  They are purrrrfect for small gifts and in my world Christmas is coming....
 Peppercorns