Showing posts with label pumpkin. Show all posts

Tuesday, November 15, 2011

ONE LAST PLUG FOR THE MAGNIFICENT PUMPKIN

Wool pumpkins Autumn Halloween Thanksgiving

It's nearly Thanksgiving and almost time for us to say good-bye to the pumpkin.  I have been planning ahead though and now have seeds for three kinds of pumpkins for next year....peanut pumpkins, white pumpkins, and a mix of orange and white miniature pumpkins.  Hopefully, I'll have the best ever pumpkin patch...at least I'm optimistic at this point.

Before we leave the pumpkin season I'd like to feature a few of the most interesting takes on the pumpkin that I've found on Etsy.  This little gallery is my tribute.

Pumpkin Patch Vintage Chenille Garden Fresh Pumpkin Pillow

Wooden Pumpkins - Set of 2

Tiny Pumpkin Patch - terrarium necklace


Edible Chocolate Filled Candy Pumpkins 1 DOZEN

Hand Blown Glass Pumpkin  Fall Harvest Half Cherry Pumpkin

Fall Decor -  Paper Pumpkins

Miniature Pumpkins Fall Autumn Orange Harvest

WELCOME PUMPKIN With Autumn leaves for Fall, wall and door hanging decor

White Polka Dot Fabric Pumpkin, Fall, Autumn, Halloween, Harvest, Thanksgiving, Soft Sculpture, Home Decor

Felt Pumpkin Halloween or Thanksgiving Home Decor or Handcrafted Pretend Play Food - 1 Pc.

MADE IN (1) DAY....(custom order).....primitive fabric pumpkins--set of 3--handmade---halloween--thanksgiving--home decor

I love all these items and I hope you'll find something that will fit right in with your Thanksgiving decorations.
Have a wonderful day!

Pepper

Tuesday, October 11, 2011

Painted Pumpkins by Susie Harris


Continuing the Fall harvest theme, I'd like to introduce you to Susie Harris and her wonderful blog.

http://www.susieharrisblog.com/2011/09/diy-painted-pumpkins.html

 Here is her tutorial for painting pumpkins, in her own words: 


Want blue/green pumpkins but hate to spend the bank?

You can change your old ones as easy as ABC.


I started with some craft paint. Celery green was my base color for this pumpkin.


I just painted one quick coat with a foam brush.

It's ok if your orange shows... We will paint layers and orange is good ;)

Between layers I hang them to dry like this..
After my first coat dried, I used slate green. You can get real creative with your colors. I tried to stay with colors close to my decor.


This time instead of using a foam brush I used this round blotter. I'm sure it has a fancy name but I have no idea... ;) Just a tip...before you blot your pumpkin, blot it a few times on a paper plate. This will give it a more realistic look.


I left the cracks of the pumpkins the darker shade for some contrast :)


See how a little orange showing through looks nautral?


Have fun with it! On a few I even added a little grey/black. For shiny pumpkins, I sprayed on a little clear coat.


This was such a fun project! Just think of the possibilities.... Have fun! susie~

Thank you so much Suzie for sharing this DIY pumpkin project with us.  I'm anxious to get to the store and pick up a few pumpkins to paint for my own home.

Pepper

Monday, October 3, 2011

PUMPKINS! I LOVE PUMPKINS!

Most people who have followed this blog for any length of time realize that I have a "thing" for pumpkins...in fact when Autumn season comes along you will find us traveling...with mini pumpkins on our dash...WooHoo...It is now Autumn!

Pumpkin Time :)

So I went surfing, on the internet,  for a tutorial on how to create a fabric pumpkin and found just the pumpkin I wanted to make...on a wonderful blog... "The Simple Wife", click on the blog name to be taken to her tutorial...it was written in 2008 so it may take a few minutes to load...but it is worth it!

 Today, I went to work creating my fabric pumpkin:
First I chose a piece of heavy upholstery fabric (my suggestions is to use a lighter weight fabric for your first pumpkin, this was harder to work with).  I looked at both sides of my piece...
And decided to use the "wrong" side since it had more orange in it...


Following the directions on The Simple Wife I put the 2 ends together and created a seam, I used my sewing machine but this could be hand sewn also.


Next, I hand sewed a large running stitch all along one edge, about 1&1/2" up from the edge.  This was my gathering thread and it needs to be a strong thread and a double thread to make sure it does not break as you gather.  When the gathering was tight I tied the thread ends together and ran a few stitches through the fabric to make sure the gathers held.


I then turned my Pumpkin  so the correct side was now out....
 At this point I hand sewed another running stitch around the top edge of the pumpkin, again about 1 to 1&1/2" from the edge.  I did not gather it yet.

Joanne, The Simple Wife,  recommends filling your pumpkin with a mix of fiberfill stuffing and either rice or beans...for me it worked best to put a layer of fiberfill on the bottom, the filler in the middle and another layer of fiberfill on top, I also shoved fiberfill into the nooks and crannies to get the pumpkin shape I wanted.

After filling my pumpkin I gathered the top with the running stitch, tied the threads and sewed the top a little tighter to secure the thread.


Now for the stem,  Joanne suggests using actual stems from a pumpkin if you can obtain them without removing them from pumpkins in a store :)  I had no pumpkin stems :(  but I do have a husband willing to go the extra mile for me...in this case it meant he went to our yard and "trimmed" some bushes to find the perfect chunk of branch for my pumpkin :)  

Thanks Honey!
I inserted the stem into the hole where the top is gathered, (mine is not secured  yet)...Joanne suggests gluing it with hot glue...but for now it seems fine just as it is :) 

I have it sitting, with 2 others I created today, on my table...Once you get the hang of making these they take about an hour each...


Thanks Joanne for putting your tutorial together, it was perfect!


VE aka VintageEmbellishment

Monday, June 6, 2011

Our Mystery Garden


Last year we planted some seeds that a friend shared with us...they were Peanut Pumpkin seeds, probably one of the most "unusual" pumpkins I have ever seen...or at least seen a picture of...
I went online to find out the best way to nurture these seeds into full grown pumpkins....I found out how to tell the male flowers from the females...(It is the females that produce the actual pumpkins, but they have to be pollinated by the males, usually via bees), we had no bees :(  Oh NO!  I learned to take a small brush, brush it across the interior of the male flowers and then across the interior of the female flowers...yep I did that!  
Much to my delight 3 of the females soon had little round pumpkins under them....as the flower dried up and blew away the pumpkins grew, we watered, we moved them, we lovingly tended them and when they were about the size of a large orange...something came in the dark of the night...and drilled a tunnel through them...they shriveled up and died...:(   
My visions of a pumpkin patch....

                                                  Pumpkin Patch

OK, so maybe not one as great as Marlene's...a little smaller maybe....none the less, my vision was over...

And then, a month or so ago, my husband noticed little green plants growing where last years pumpkins had been planted (he had also buried a couple of potatoes there in the spring?).  He noticed there were potato plants coming up and something else....
Not sure but we think these may be pumpkins...since last years pollinating and loving care was for naught...I am going with benign neglect this year...:)
I realize that is obvious from the photos....

We have had little mini pumpkins grow here every few years, they seem to come up on their own, grow on their own and even survive on their own....

I guess time will tell, but for now it is our own little mystery....garden!

VE

Friday, February 11, 2011

Let's Make Whoopie

Pies!

On my weekend antique shopping sprees, my breakfast every Friday is a whoopie pie and coffee at the Green Dragon Market!   Skip the free breakfast at the hotel, this is much better!
These are the traditional ones shown above and the only ones I eat!  However, you can find all kinds.  (Click on photos below to be taken directly to shop)
Butternut Spice by MilliesPlace

Red Velvet by Cacaobakery

Pumpkin by BakeMePretty
 
And now, here is some history about whoopie pies and some recipes!
 
 
Have fun!
RWS

Tuesday, October 19, 2010

Fall Giveaway!


We are pleased that we have reached 100 followers to our blog!  In appreciation, we are having a giveaway.
Rules, please read carefully!
1.  Guess how many loose Pez candies are encased in this bowl without going over!
2.  Email your guess along with your name and how you can be contacted (if you are the winner) to ArtistandPickers@aol.com
3.  Please do NOT write your guess in the comments of the blog, all entries must be emailed to the above address.
4.  In the event of a tie, the first guess emailed will be declared the winner.
Contest runs from Tuesday, Oct. 19th. to Monday, Oct. 25th at Midnight EST.


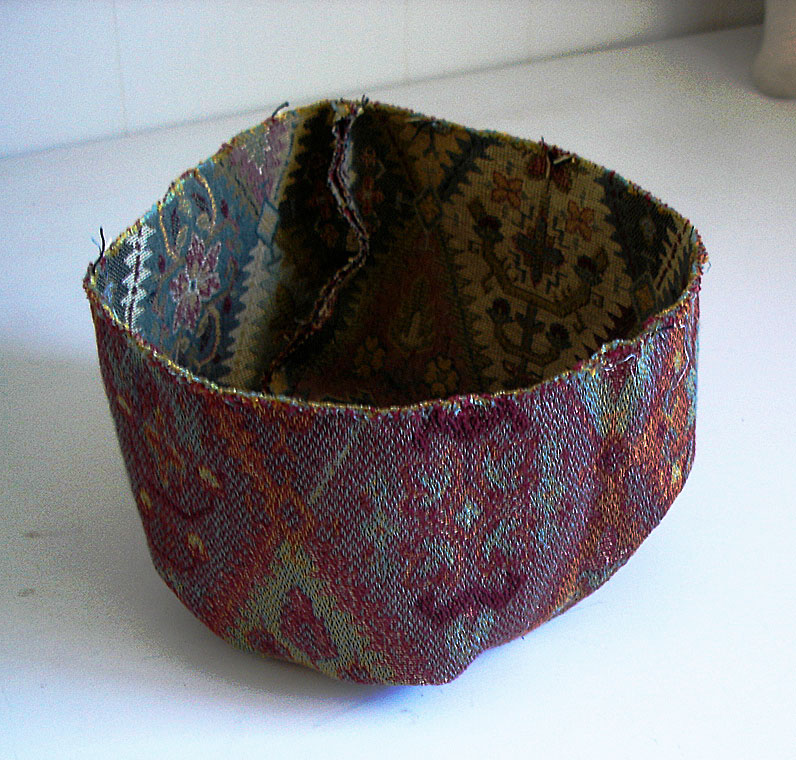
Dimensions of the bowl are 12 1/4" wide by 5 3/4" high, if that's any help!
Now for the prizes!  We have gone with a Fall theme and they are as follows.
1.  Needle felted pumpkin from VintageEmbellishment
2.  An original handpainted work of art ACEO from Peppercorns2
3.  Vintage pair of bear salt and pepper shakers from MySeriousSide
4.  Vintage pin and handmade tags from DoodleVintagePlus
5.  10 handmade Moravian stars from JustJanesThings
6.  Hand stitched primitive pumpkin picture from VintageStation
Prizes valued over $70!!!
Thank you so much to those shops that have donated prizes! 
Have fun!
RWS

Monday, September 13, 2010

How Do They Do That??? Making a felted Mini Pumpkin..


Last year,  after viewing so many wonderful items on Etsy,  I became intrigued with  needle felting….and since I am one of those people who says “I think I can make that”, I set out to learn how to make a cute little pumpkin!

Thankfully there is something called the Internet and it is full of helpful people…

The photo is a little pumpkin I created this week…in a little over an hour!

I have also made pumpkins with my Daughter and Granddaughters….the 12 year old GD was able to handle the needle safely but I did the needle work for the 6 year old….this is a very sharp needle and must be used with caution…

(An aside here…one of us in this collective cannot be trusted with a sharp needle, and they know who they are….LOL!)

Want to make one for yourself?  Well gfelted of  www.gfelted.etsy.com
has written the best tutorial on just how to do it…and my gift to you is the link (with her permission of course).

http://gourmetfelted.wordpress.com/2009/09/07/tip-of-the-weekneedle-feltingnew-pumpkin-tutorialbatting/

I think she can be persuaded to create some kits that would have all you need to make these little gems for yourself….if you ask her nicely :)

OK, OK, mine is not as creative as hers is, but if you wander around her shop for a bit you will discover she is an artist …and I am only an antique dealer :(

Don’t have a clue about the basics of needle felting?  Here is another good link that can get you started…

http://www.thesilverpenny.com/FreeProjectNeedleFelting.html

Have fun, and go ahead, blame me if you get hooked on needle felting :)


Vintage