Showing posts with label stitching. Show all posts

Saturday, November 20, 2010

Stitching with Waste Canvas

What is waste canvas? 

Waste canvas is a  canvas with grids,  held together with a water soluble glue. When basted on non-evenweave fabric, waste canvas assists in stitch placement. Use waste canvas to turn almost any material into a Cross Stitch fabric.

For this lesson, I'm using a very basis, simple pattern.  You can use any pattern as long as it fits on the garment and waste canvas.
Gather what you need!  I'll be using a T-shirt for this project.
Cut the waste canvas to the size you need (I'm using 14 count waste canvas), leaving plenty of canvas around the pattern you'll be stitching.  I use safety pins and attach the waste canvas to the garment.  Some people use a long running stitch to attach the canvas to the garment.  Also, you can use interfacing on the back, if you want to.
Find the center of your pattern and center it on the waste canvas.  Use a hoop just as you would if you were stitching on Aida cloth etc.
Start your stitching according to your pattern.  You will stitch over two threads or in other words, skip one hole in the canvas.
These patterns can be easy or more detailed, I've done them both and the results are always wonderful!
This is the finished project as far as the stitching goes.  Now you will remove the waste canvas!

I cut the waste canvas down being very careful not to cut the garment.  Leave enough waste canvas around the edges to easily grip the threads.  Tweezers are often necessary for this and makes it easier.  If you have an area with a lot of stitches, it might be a little more difficult to pull out the threads, you can dampen the waste canvas with water, I use a spray bottle.  This will make the threads very soft and easier to remove.  Since I don't have a lot of stitches in this project, it wasn't necessary to wet the waste canvas.
Now add the buttons to each stem and you are finished!
I'm all ready for Spring!
You can make some awesome baby gifts using the waste canvas.  Onsies, hooded bath towels, bibs all make great items for this.
My favorite items to do are Winter sweatshirts!  I've done so many Christmas ones, here is a great source for books:  A1 Craft Patterns Cross Stitch Waste Canvas Patterns Take note of Holiday Lineups, the Christmas one is great!  Another fun one is Ye Olde Santas, I've done all of them in that book! 

I've done socks, the little roll down white kids socks with lace around the cuffs are great for this.  You can do a little duck, butterfly or any small pattern.  Dress up vests, sweaters, blue jeans, denim shirts and anything else you want to add a little something extra.

BTW, want to know the cost of this project?  I purchased the T-shirt on sale at the local craft shop, cost $2.50.  One color floss for .35 cents.  Waste canvas I found at a thrift shop for only .47 cents (usually around $2.50 in shops) and the buttons I had laying around the house.  Total cost for mine:  $3.32!!!!!  Watch those sales for great prices on T-shirts and sweatshirts.  The booklet was one I had laying around too but they usually run about $4.00 and I search for ones that have a lot of patterns I like so I can use the book for many projects.
RWS

Tuesday, October 19, 2010

Fall Giveaway!


We are pleased that we have reached 100 followers to our blog!  In appreciation, we are having a giveaway.
Rules, please read carefully!
1.  Guess how many loose Pez candies are encased in this bowl without going over!
2.  Email your guess along with your name and how you can be contacted (if you are the winner) to ArtistandPickers@aol.com
3.  Please do NOT write your guess in the comments of the blog, all entries must be emailed to the above address.
4.  In the event of a tie, the first guess emailed will be declared the winner.
Contest runs from Tuesday, Oct. 19th. to Monday, Oct. 25th at Midnight EST.


Dimensions of the bowl are 12 1/4" wide by 5 3/4" high, if that's any help!
Now for the prizes!  We have gone with a Fall theme and they are as follows.
1.  Needle felted pumpkin from VintageEmbellishment
2.  An original handpainted work of art ACEO from Peppercorns2
3.  Vintage pair of bear salt and pepper shakers from MySeriousSide
4.  Vintage pin and handmade tags from DoodleVintagePlus
5.  10 handmade Moravian stars from JustJanesThings
6.  Hand stitched primitive pumpkin picture from VintageStation
Prizes valued over $70!!!
Thank you so much to those shops that have donated prizes! 
Have fun!
RWS

Saturday, October 16, 2010

Another Cross Stitch Lesson - Perforated Paper

I love stitching and love finding new ways of doing it!  When I found perforated paper or punch paper, I was hooked.
 
Perforated paper is a thick paper with holes evenly punched on it.  It is the same as using 14 count fabric but you can only use it for whole stitches, you cannot poke holes in it for half stitches.  So, anything you can do with fabric with only whole stitches, you can do on perforated paper, as long as it's not too big!
 
Mill Hill uses it for their beaded ornament kits and their pin kits, it's so easy to work with and things work up quickly with it, plus you don't need a hoop!
 
It's available in all kinds of colors and now even available with patterns on it for backgrounds.  I'll provide links later!
 
If you would like to see some old works done on this paper, there's a wonderful article here:  http://www.victoriana.com/Embroidery/perforatedpaper.html  Shows many examples of work done in the Victorian Era.

Now, for some of my works!  I have done plenty of ornaments and pins, but don't have any photos of them.  But here is a small pair of earrings I made:
 These work up in a matter of minutes!
 
You do the stitching and then carefully cut the paper about one hole away from the stitching.
 
I found this frame and just had to have it!  I worked up a watermelon for it to use in my bathroom that is decorated with watermelons and primitives.
Next is one of my favorite items!  I used handmade blocks that my hubby made for me and he carved out a section on one side, I make up the tiny paper squares and push them into the front section.  I can change them easily for different occasions.
I purchased an inexpensive shaker box that I stained and set the blocks on top of that with the extra unused squares inside it for storage.
Even Gladys loves it on top of them and is right at home there.
This next item is a doorknob hanger.  I made this one using one sheet of paper and doing all the stitching on that, then I used a second sheet that I just stitched to the first to cover the back and the stitches don't show!
And another one of my all time favorites, these are the same blocks I used before but I stitched up a Christmas tree including the presents on the bottom.  Then, just stack the blocks to make the tree!
A close up view:
The last one I wanted to show is another Christmas item:
So simple but it makes quite the impact!
 
It's recommended you use 2 or 3 strands, I've found I like using 3 strands for better coverage.  If you are just starting out, I suggest you purchase a kit, they have everything you need and have wonderful instructions.  I'd start out with doing either Christmas ornaments or bookmarks.  When you feel more comfortable, try some Mill Hill pins!  Here's the link for pins:
 
 and while there, look at how many colors of perforated papers they have!   
(I love the sky blue and olive green!)
 
RWS

Saturday, October 9, 2010

Primitive Stitching


I love the simplicity of primitive stitching!  There's no rules, you do things the way you want to.
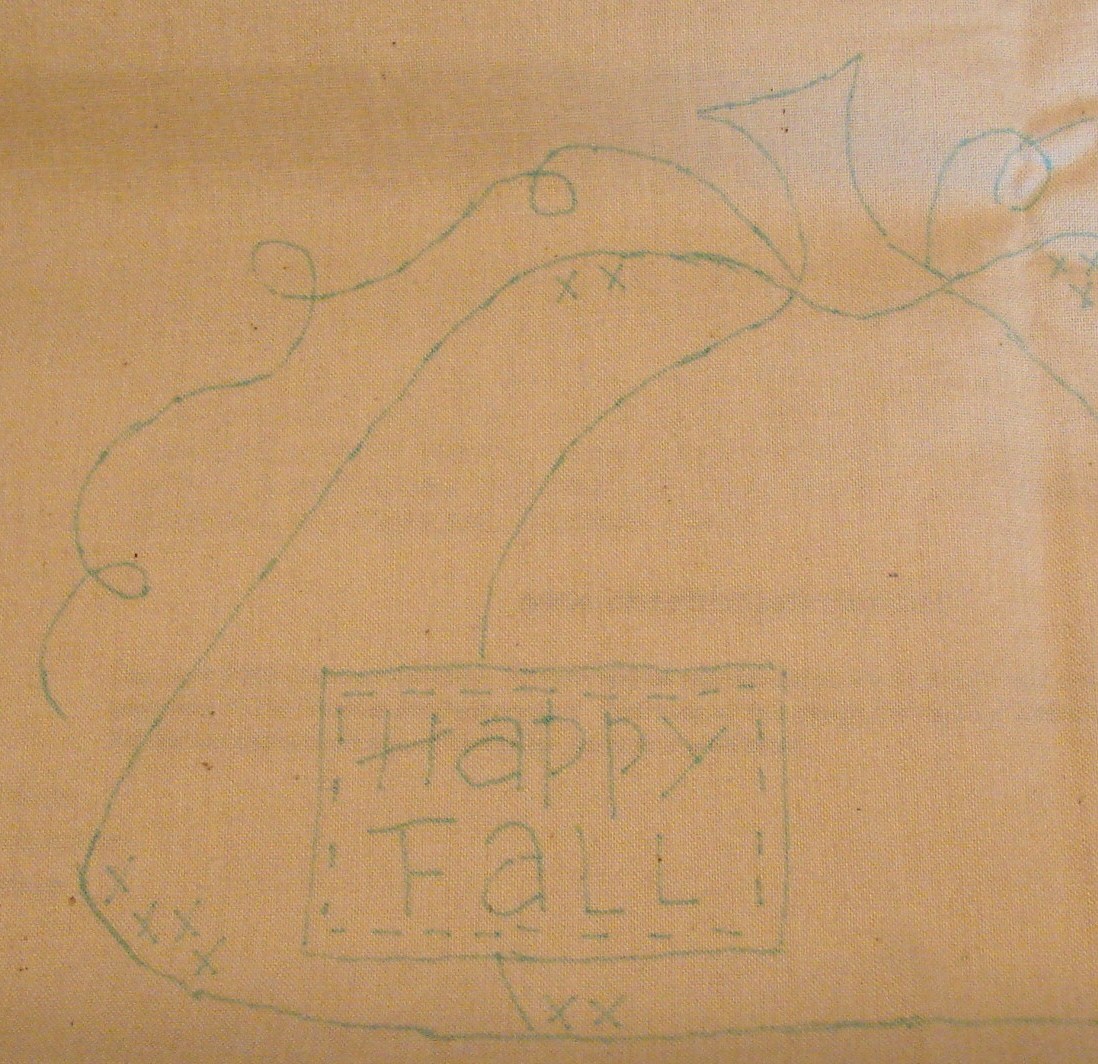
You start out with a pattern, muslin (color of your choice) and a Mark B Gone (these are the fabric pens that disappear when you are done and wet the fabric) pen.

Lay the muslin over the pattern and trace it with your Marks A Lot pen.  If you are having trouble seeing the pattern, you can use a light box behind it all.

Now you start stitching following the lines.  Your stitches don't need to be uniform, that's the fun of primitive stitching.
I used 4 strands for the Happy Fall sign and 2 strands for the rest.  I love using the loop method when stitching so there's no knots on the back.  Only drawback to this is you must use an even amount of strands.

Continue to stitch until finished.  At this point, you can tea dye the fabric or do other methods of your choice to darken the material or make it look old.

This project is on the smaller scale and can easily be done in a few hours during the evening!  Do a larger one for a weekend project.  Either way, they work up quickly.  Most primitive stitcheries use very few colors. 
After dying, press the entire piece and frame.  I use quilt batting to back it and never put glass on them.

I've done so many of these and have always enjoyed doing them.  Believe it or not, I don't have one of these of my own, they are always taken by friends or family members!  I think my favorite ones to do are Halloween primitives!

This one is going to be part of the next blog giveaway!  Hope you like it.
RWS