|
| tanyabond |
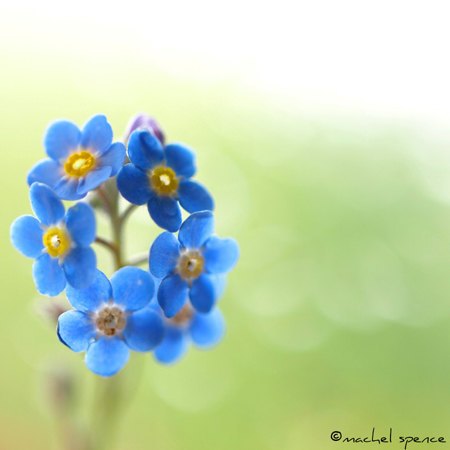
I love forget-me-nots.
I have had these growing in my garden for quite a
few years now. Some years my garden
looks like a sea of blue, other years there are only a few of these showing up.
They seed and spread all on their own and I let them grow wherever they want
to.
 |
| wavyshell |
I used to work with a lovely lady, who was a retired
school teacher. So when she worked with me she was just doing that to keep
busy. She had no need to work really.
She had not started teaching until she was in her fifties and I believe
that she was the kind of teacher that every kid would have wanted to have.
Eventually she had some health problems and ended up moving to another state to
be closer to her niece. Anyway, she would write me notes and they almost always
had pictures of forget-me-nots on them. So when my garden is in full bloom with
these little unassuming flowers, memories of dear Madeline bloom also. I have
not forgotten her.
 | |||
| gardenblooms |
(there is a lot of information on other wildflowers
too.
How the Forget-me-not got its name (Myosotis sp.)
 |
 This European perennial is one of the world’s most-loved
wildflowers, and though the little clusters of sky blue flowers are wonderful,
the romantic legend of how it got its name is ever better. The plant is a
streamside species, so the setting makes sense. A medieval German knight is
said to have been picnicking on the bank of the Danube
with his lady love. He descended the bank to the water’s edge to gather some of
the lovely blue flowers he saw there, but while he was near the water, tragedy
struck. A “freshet” (flash flood) suddenly appeared and pulled the young man
into the churning river. As he was literally swept away, he tossed the bouquet
to his lady on the bank with the three now-famous words: “Forget me not!”
This European perennial is one of the world’s most-loved
wildflowers, and though the little clusters of sky blue flowers are wonderful,
the romantic legend of how it got its name is ever better. The plant is a
streamside species, so the setting makes sense. A medieval German knight is
said to have been picnicking on the bank of the Danube
with his lady love. He descended the bank to the water’s edge to gather some of
the lovely blue flowers he saw there, but while he was near the water, tragedy
struck. A “freshet” (flash flood) suddenly appeared and pulled the young man
into the churning river. As he was literally swept away, he tossed the bouquet
to his lady on the bank with the three now-famous words: “Forget me not!” |
| PanChupCrafts |
 |
| sweetdejavu |
 |
| ManateesToyBox |
Have a delightful day….
(jj)